Disable ads in µTorrent

Turn off ALL Ads/Featured Content/Bundle Crap in Utorrent/Bittorrent:

Options > Preferences > Advanced…
Turn ALL settings to false:

  • bt.enable_pulse
  • distributed_share.enable
  • gui.show_notorrents_node
  • offers.left_rail_offer_enabled
  • gui.show_plus_upsell
  • offers.content_offer_autoexec
  • offers.sponsored_torrent_offer_enabled
  • offers.featured_content.badge.enabled
  • offers.featured_content_notifications_enabled
  • offers.featured_content_rss_enabled
    Hidden menu = Options > Preferences > Hold F2/Shift while clicking Advanced:

  • gui.show_gate_notify
  • gui.show_plus_av_upsell
  • gui.show_plus_conv_upsell
  • gui.show_plus_upsell_nodes

Getting Started with Unit Testing

This is another in Robert’s Getting Started series, where he provides an introduction to a topic that everyone knows about but not everyone is actually doing (or doing enough of). In this episode, part 1 of 3, Robert shows how to get started with unit testing in Visual Studio. The primary goal of unit testing is to take the smallest piece of testable code in an application, isolate it from the remainder of the code, and determine whether it behaves exactly as you expect. Each unit can be tested separately and can easily be tested over and over again.

In this episode, he shows how to write unit tests that test the UI interactions in a XAML application. He then shows how to create data-driven tests and how to perform a code coverage analysis to determine what parts of your code are being covered by unit tests.

In this episode, Robert wraps up his 3 part series on unit testing. He shows how to use Microsoft Fakes, which enable you to replace a method call with a stub or shim in your unit tests. For example, you can declare, for the purpose of running a unit test, that a call to a random number generator always return 6 or that a call to the Save method of a service always returns true. That way, you can test the rest of the code in that unit. Robert then shows how to configure continuous integration with Visual Studio Online. Once you do that, all of your unit tests will be run every time you check in code.

You can find the sample code and demo scripts for the entire 3 part series here.
How to disable ads in Skype’s chat window

  1. Go to the Control Panel
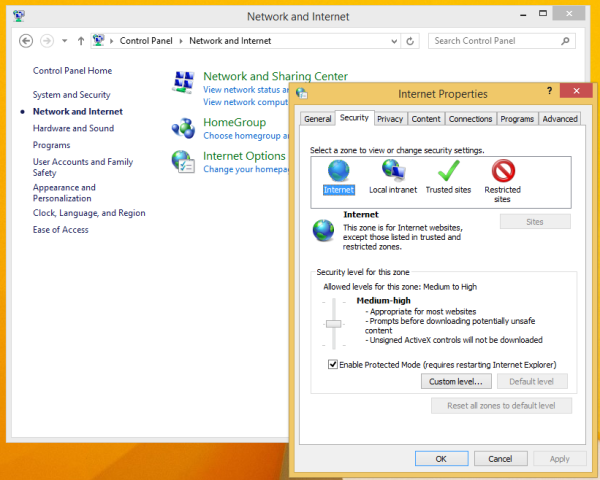
  2. Locate and open the Control PanelNetwork and InternetInternet Options item.
    Internet-Options-600x480
  3. Switch to the Security tab.
  4. Click on ‘Restricted sites’ icon and click the Sites button:
    Security-tab
    The ‘Restricted sites’ dialog will appear on the screen.
  5. Type the following in the text box and then press the Add button:

    https://apps.skype.com/

  6. Close Internet Options and restart Skype.

How to Shutdown – Restart – Logoff Windows via Command Prompt

  • shutdown -r — restarts
  • shutdown -s — shuts down
  • shutdown -l — logoff
  • shutdown -t xx — where xx is number of seconds to wait till shutdown/restart/logoff
  • shutdown -i — gives you a dialog box to fill in what function you want to use
  • shutdown -a — aborts the previous shutdown command….very handy!

Additional options:

  • -f — force the selected action

How to Enable or Disable Hibernate in Windows 7 and Windows 8

To enable hibernate

This step will restore the hiberfil.sys file, and the Allow hybrid sleep and Hibernate after Power Options underSleep.

  1. Open a Elevated Command Prompt.
  2. In the elevated command prompt, type powercfg -h on and press Enter. (see screenshot below)
    To Enable Hibernate

To Disable Hibernate

This step will disable hibernation, delete the hiberfil.sys file, and remove the Allow hybrid sleep and Hibernate after Power Options under Sleep. This will also disable fast startup in Windows 8.

  1. Open a Elevated Command Prompt.
  2. In the elevated command prompt, type powercfg -h off and press Enter. (see screenshot below)
    To Disable Hibernate

How to find Windows uptime?

1.  Go to “Start” -> “Run“.
2.  Write “CMD” and press on “Enter” key.
3.  Write the command “net statistics server” and press on “Enter” key.
4.  The line that start with “Statistics since …” provides the time that the server was up from.

  •   The command “net stats srv” can be use instead.

Create an Ad Hoc Wireless Network

Mac OS X

  1. Open System Preferences.
  2. Open Network.
  3. Clic on Wi-Fi on the left.
  4. Open drop down list Network Name.
  5. Select option Create Network…
  6. Enter a new name, for example “LogicNetwork”.
  7. Make sure the Status is On.

Windows XP

  1. Open the Start menu.
  2. Click on Control Panel.
  3. Under Pick a category, click Network and Internet Connections.
  4. Under Pick a Control Panel icon, click Network Connections.
  5. Right-click your wireless network connection, and then click Properties.
  6. In the Wireless Network Connection Properties dialog box, click the Wireless Networks tab.
  7. On the Wireless Networks tab, under Preferred networks, click Add.
  8. In the Wireless network properties dialog box, on the Association tab, type the name of your ad hoc wireless network in Network name (SSID) box. For example, you could name your wireless network “LogicNetwork”.
  9. Clear the The key is provided for me automatically check box.
  10. Select the This is a computer-to-computer (ad hoc) network check box.
  11. Create a password and type it in both the Network key and Confirm network keyboxes. For the best security, include letters, numbers, and punctuation. Then clickOK.
  12. Click OK again to save your changes.

Windows Vista

  1. Open the Start menu.
  2. Click Connect to.
  3. Click Set up a connection or network.
  4. Select Set up a wireless ad hoc network and click Next.
  5. Enter the new network name such as “LogicNetwork”.
  6. Enter a Security key.
  7. Check Save this network.

Windows 7

  1. Open the Start Menu.
  2. Click Control Panel.
  3. Click Network and Internet.
  4. Click Network and Sharing Center.
  5. Under Change your networking settings, click Set up a new connection or network.
  6. Select Set up a wireless ad hoc (computer-to-computer) network.
  7. Click on Next twice.
  8. Enter the Network name such as “LogicNetwork”.
  9. Select the Security WAP (or WEP).
  10. Enter the Security key or password.
  11. Check Save this network check box.
  12. Click Turn on Internet connection sharing.

How To Install VMWare Tools on Ubuntu

  1. Update the server
    sudo apt-get update
    sudo apt-get upgrade
  2. Change Directory
    cd /media/cdrom
  3. Copy the tar file to your /tmp directory
    sudo cp VM*.tar.gz /tmp
  4. Install Build tools if necessary
    sudo apt-get -y install linux-headers-server build-essential
  5. Change Directory
    cd /tmp
  6. Expand the tar
    sudo tar xzvf VM*.tar.gz
  7. Change Directory
    cd vmware-tools-distrib
  8. To prevent a potential error in the install script on Ubuntu 11.10+, create a special directory
    sudo mkdir -p /usr/lib64
  9. Run the Install Script. The -d flag automatically answers the default to all questions. To customize it, just omit the -d.
    sudo ./vmware-install.pl -d
  10. Reboot
    sudo reboot

VMware Player and Hyper-V are not compatible. Remove the Hyper-V role from the system before running VMware Player.

You can disable Hyper-V without uninstalling it. Start a command prompt with administrator rights and execute the following command:

// to disable hyper-v
bcdedit /set hypervisorlaunchtype off

// to enable hyper-v
bcdedit /set hypervisorlaunchtype auto

Both Operations require restarting your computer.

Global .gitignore

  1. Add .gitignore file to your user directory (C:UsersMantas.gitignore)
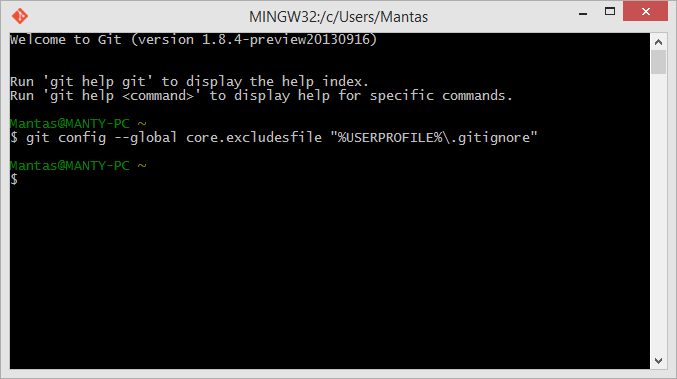
  2. Update core.excludesfile file with Git Bash using this command:
    Windows:
    git config –global core.excludesfile “%USERPROFILE%.gitignore”
    Linux:
    git config –global core.excludesfile ‘~/.gitignore’
    global gitignore